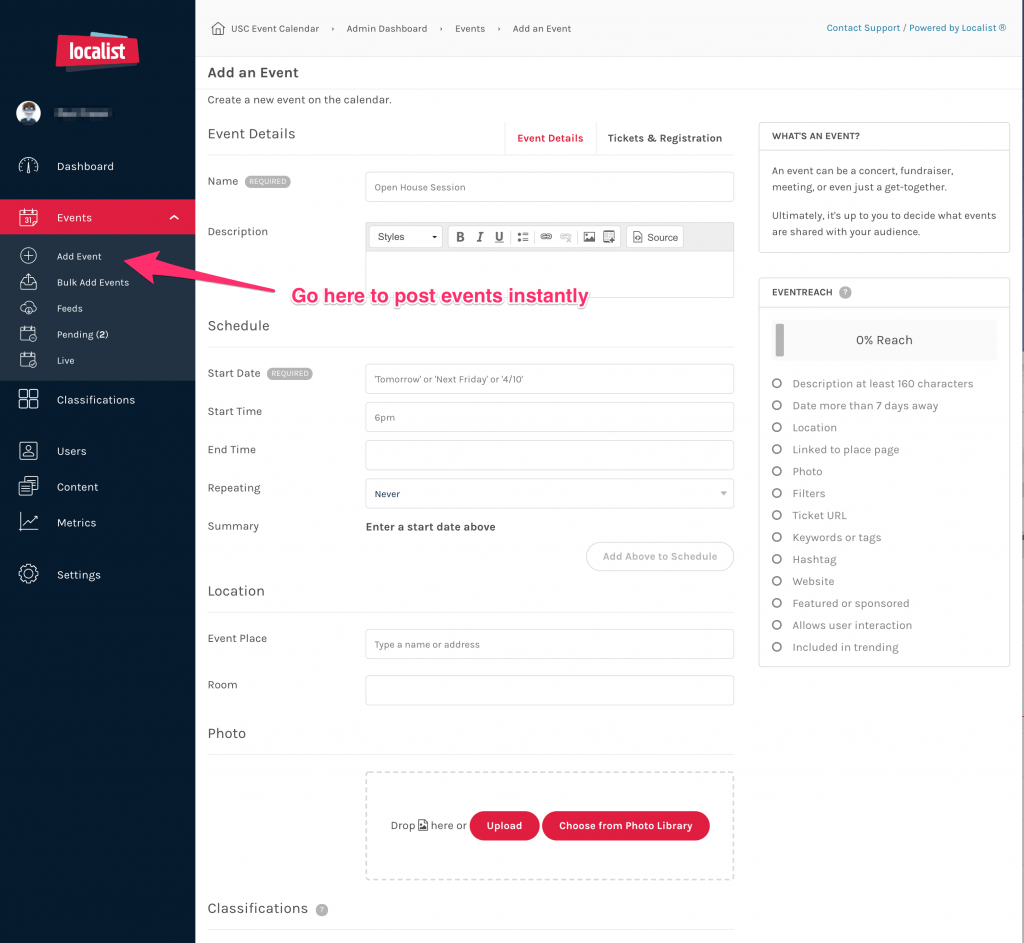
As an approved administrator, your events appear on the calendar instantly. Follow these steps to post events from your dashboard.
Step 1: Login
- Click Login on the right side of the page.
- Authenticate via Shibboleth.
- Under your profile image, select Calendar Admin.
Step 2: Add Your Event
- Navigate to Events > Add Event.
- Complete the form. Localist (Concept 3D) provides field-specific guidance if needed.

Best Practices
Do:
- Select your department from the Department / Group dropdown. Your event won’t appear on your calendar without this.
- Add an RSVP or registration link in the Ticket URL field to enable the registration button on the event page. You can also include a “Register” link in the event description.
- Follow event listing best practices for titles, descriptions, and photos.
Don’t:
- Use the Featured dropdown. This is for the USC calendar editor only; selecting it may remove your event from the calendar.
- Use images with text, such as flyers or presentation slides. Photos should be horizontal and visually clear.
Step 3: Save Your Event
- Click Save.
- Your event will appear on your department’s calendar and the main USC calendar within 1–3 minutes.
- External feeds may take up to 30 minutes to update.
Notes
- Tags: The system uses tags to route and filter events—they are not hashtags. If you want attendees to use a hashtag, include it in the event description.
- Public form warning: If you accidentally use the public submit form (on the main page of the calendar, rather than logging in first) your event may go into the pending queue, and you will have to approve your event.
- If you need to post an event to a department you do not manage, use the public event submission form. Your submission will go to that department for approval and publication.